Корзина
В вашей корзине больше ничего нет
- Новости
- 0 likes
- 1043 просмотров
- 0 comments

|
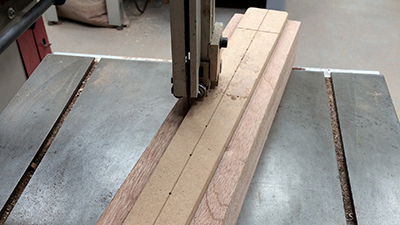
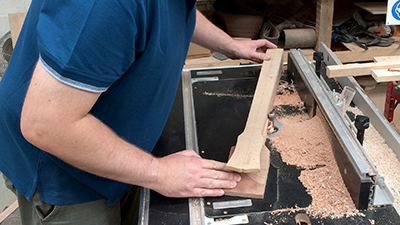
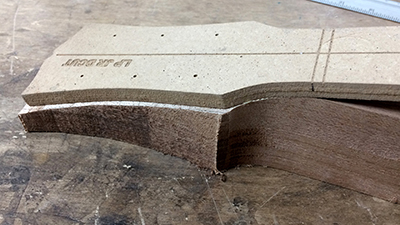
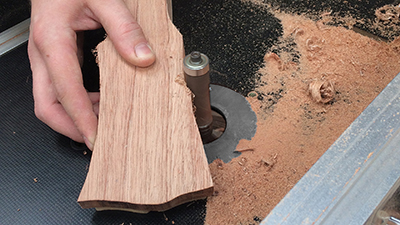
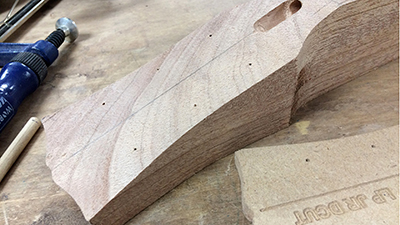
The second day began with more work on the guitar neck. We attached a neck template to the neck blank and cut the shape of this roughly on the bandsaw (Fig 14) then cleaned up the edges on the router, using the template as a guide (Fig 15). Once complete, we removed the template and carefully re-fitted it to the angled headstock section of the neck (Fig 16). We then used the template as a guide for the router again to finish the edges (Fig 17). |
Fig 14
Fig 15
Fig 16
Fig 17 |
| Before removing the template, we used a 2 mm drill bit to mark the centres of where the tuning peg holes in the headstock will eventually be (Fig 18). |
|
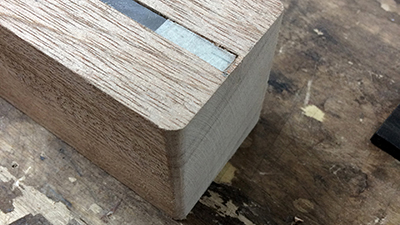
| The next job was to tidy up and round off the heel of the neck before fitting the fretboard, using a rasp and file. When the guitar is assembled, the heel will fit into the neck “pocket’ in the guitar body. This pocket is a routed out recess, leaving rounded corners from the router bit, so the heel must feature similar rounded corners to allow correct fitment (Fig 19). |
Fig 19 |
|
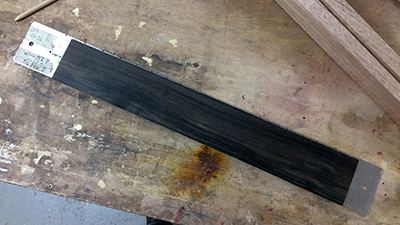
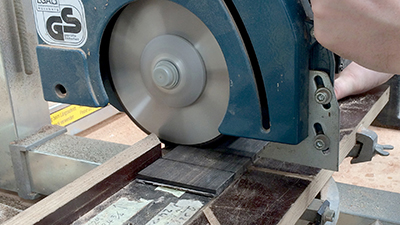
The fretboard was the next piece to work on, after sanding it down to a height of 6 mm, we attached it to a custom-made jig to use with a mitre saw (Fig 20). The notches in the jig registered around a locating pin on the saw table, meaning that the slots for each fret could be cut in exactly the right positions using a circular saw blade at the correct width to accommodate the fret wire (Fig 21). |
Fig 20
Fig 21 |
| The fretboard was then carefully glued to the neck, ensuring it was accurately positioned down the centre line of the neck. This is critical, because if it is glued in a misaligned position the frets will not be at 90º to the centre line, which would mean that it would not be possible to fret the correct notes when playing. To make sure the fretboard didn’t move when the clamps applied pressure, we first lined it up in the correct position on the neck and clamped it in place lightly at either end. We then drilled a 2 mm hole at each end of the fretboard, through the fret slots, so the holes will be covered up later by the frets. Pins (cocktail sticks) were placed through the holes to stop the fretboard moving during gluing and clamping. We glued the fretboard and neck together and left them overnight (Fig 22). |
Fig 22 |
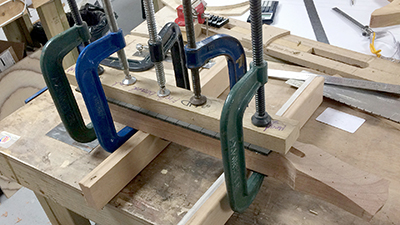
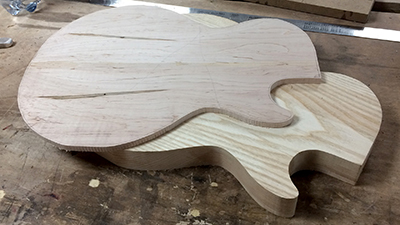
| With the neck drying, we turned our attention to the Sycamore top of the guitar body. We rough-cut this on the bandsaw then sanded it to a depth of 5 mm (Fig 23). It is good practice when making a book-matched top to do minimal sanding on the front face, as this keeps the pattern of the book-match as symmetrical as possible. The top was then glued to the body using clamps spaced roughly 50 mm (2”) apart to ensure as much contact between the pieces was made as possible. A final check was made to ensure that no gaps could be seen between the body and top and then it was left to dry overnight (Fig 24). |
Fig 23
Fig 24 |

Comments (0)