Shopping Cart
There are no more items in your cart
- News
- 0 likes
- 1264 views
- 0 comments

|
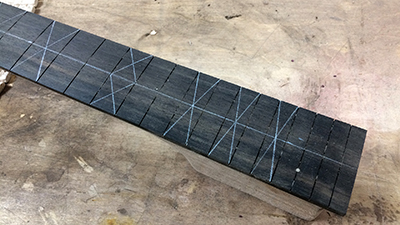
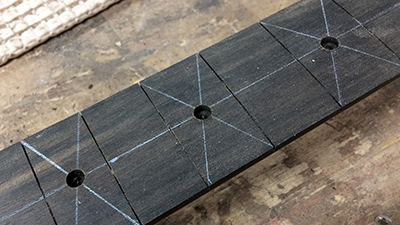
Day three saw the completion of the shaping of the guitar neck, leaving the fretboard to work on. The first job was to mark the positions of the fret markers on the fretboard with a centre line then two corner-to-corner lines between each fret ‘box’ i.e. the rectangular areas between the fret slots (Fig 38). We drilled the holes 2 mm deep to fit the inlays used for the markers (Fig 39). |
Fig 38
Fig 39 |
|
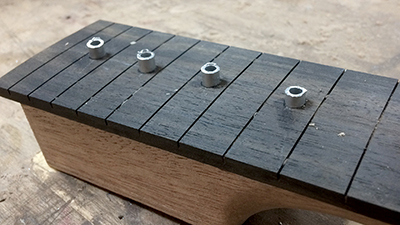
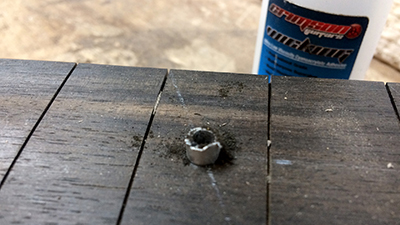
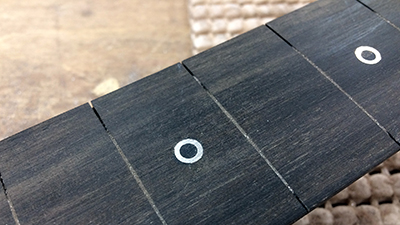
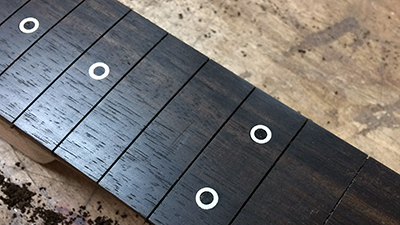
The choice of fret markers was an idea particular to Crimson Guitars which was the use of hollow 6 mm aluminium tubing. We cut the pieces long enough for them to protrude slightly from the fretboard then glued them in (Fig 40) and filled the centre holes with a mix of Ebony dust and Superglue which was done in three layers of dust, glue and then dust again (Fig 41). Once set we cut off the excess tubing with a hacksaw and filed them flush to the fretboard (Fig 42). |
Fig 40
Fig 41
|
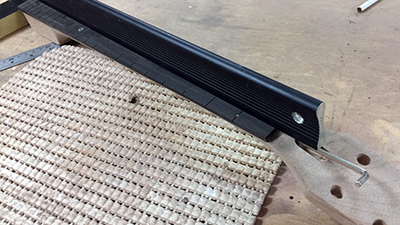
| At this stage we used a straight edge to check the flatness of the fretboard along the length of the neck, adjusting the truss rod as necessary (Fig 43). |
Fig 43 |
|
The fretboard was then sanded again to 320 grit, followed by a final pass with an ultra-fine sanding pad. Restoring oil was applied with wire wool to nourish the Ebony and give it back its shine and colour (Fig 44) which had been somewhat lost due to the sanding processes. |
Fig 44 |
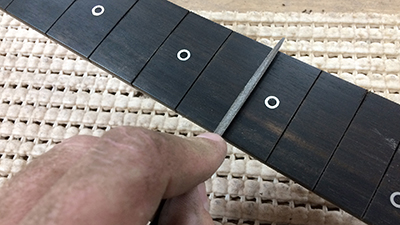
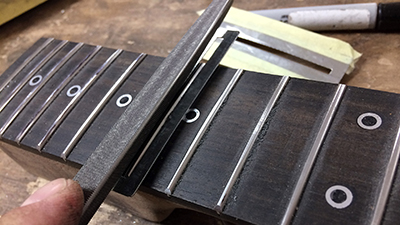
| The fret slots then needed clearing of dust using a Gent’s saw which was also used at the same time to cut the channels slightly deeper at the outside edges, to follow the radius of the fretboard. The final stage in preparing the fretboard for fitment of the frets was to run a small triangular file across all the slots to give a very slight bevel to help the frets locate (Fig 45). |
Fig 45 |
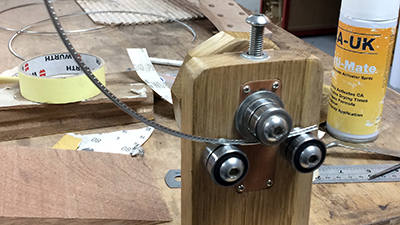
| With the fretboard ready, we took some fret wire and passed it through a fret bending jig which rolled the wire through into a large circle (Fig 46). This gives a radius to the frets which is exaggerated compared to that of the fretboard but this radius helps the frets stay in position as the outer edges dig in to the board and greatly reduce the risk of them popping out at the edges. |
Fig 46 |
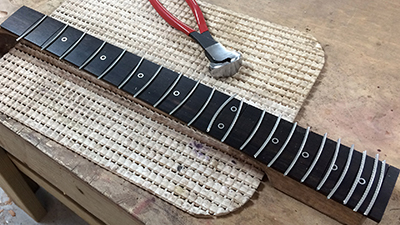
| Once radiused the fret wires were cut with an allowance for overhang (Fig 47) then hammered in one-by-one using a specialist fret hammer (Fig 48) and a tiny amount of Superglue on the tang (the straight profile beneath the visible fret area which is serrated for extra grip). |
Fig 47
Fig 48 |
|
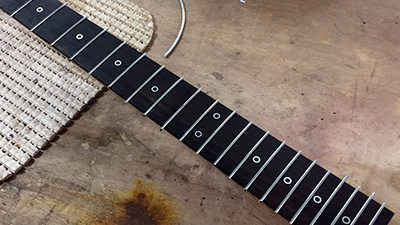
The fret slots were cut to be a very tight fit to help them be secure so this was a long and difficult job for a beginner as the frets had to be ‘rocked’ into position by the hammer to ensure the ends didn’t keep popping out before they were fully embedded. Using the same wire cutters that were used to cut the frets to length, we trimmed the frets flush with the body, filed them flush with the side of the neck then filed the sides inwards at about 22º to give an ergonomic curve to the frets so they won’t catch on the player’s fingers as they move up and down the neck, this can be seen in Fig 49. The straightness of the neck now needed to be double-checked and adjusted if necessary as the banging of the frets into the slots could have an effect. Using 240 grit sandpaper on a long straight edge we filed the frets down until they were all at the same height. By marking the tops of the frets with a marker pen it was easy to see which areas were low spots after sanding, which indicated the areas that needed attention. Once done, the level of the frets had to be checked and fine-tuned using a fret rocker (Fig 49). This is essentially a small multi-faceted straight edge which is placed over three frets at a time. Each fret must be checked with this tool from top to bottom and if the fret rocker rocks anywhere this is an indication that the fret being checked is too high. Again, a tricky and time-consuming task for a beginner but with the tutor’s guidance it was eventually completed successfully. |
Fig 49 |
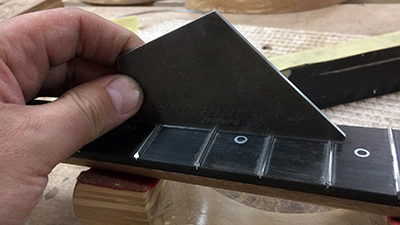
| The next stage of fret dressing was a particularly interesting one and is a detail often missed by budget guitar manufacturers: After putting three layers of protective masking tape over the twelfth fret, we further levelled and slightly lowered the uppermost frets from 16 upwards. This is an excellent idea as quite often guitars suffer from buzzing on the high frets during playing which can be very difficult and in some cases impossible to eliminate. This is due to the fact that the guitar neck is angled slightly away from the body so the highest frets are also the closest to the strings and when the strings are fretted in the high positions, the frets higher up can foul the string, causing buzzing and choking of the string. This simple operation shows the careful attention to detail that a well made guitar benefits from. With all the frets levelled, they then needed to have their domed profiles restored using a triangular file and simple jig to mask the rest of the fretboard from damage during the task (Fig 50). |
Fig 50 |
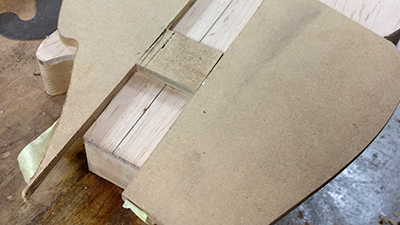
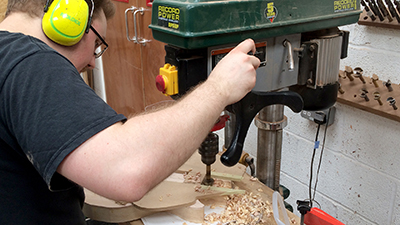
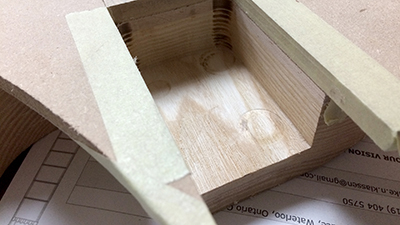
| The neck was now almost complete so we moved onto the body. We routed a curve to the bottom of the body around the whole edge. Drawing a centre line on the top of the guitar body, we carefully aligned the centre of the neck with this and clamped it in place on top of the body in the position it will be in once the neck pocket has been created (Fig 51). The neck pocket is the recess in the guitar body that holds the neck. We then drew lines extending from both sides of the neck across the front of the guitar body for reference. Once in place, we made a temporary jig for the router by attaching MDF pieces to both sides and the end of the neck heel (Fig 52). The neck pocket was first roughly drilled out with a Forstner bit (Fig 53) then routed out to the correct depth using the temporary jig as a guide (Fig 54). |
Fig 51
Fig 52
Fig 53
Fig 54 |
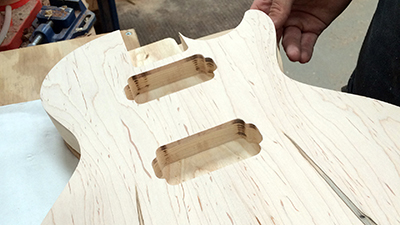
| The recesses that hold the pickups were then drilled and routed out using a template and centred correctly using the reference lines drawn on when the neck was temporarily clamped onto the body (Fig 55). |
Fig 55 |
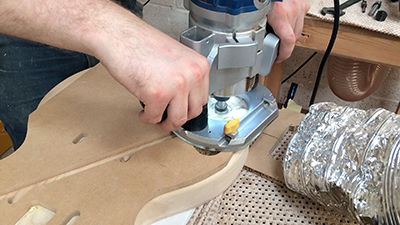
| We then attached a router jig to the back of the guitar body and routed out the recess that holds the controls for the tone and volume knobs (Fig 56). A hole was then drilled to join both pickup cavities, for the wiring to pass through (Fig 57). |
Fig 56
Fig 57 |
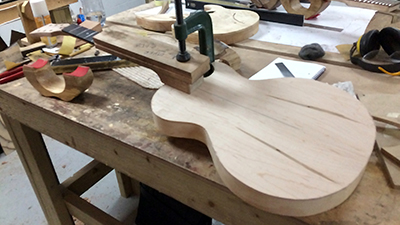
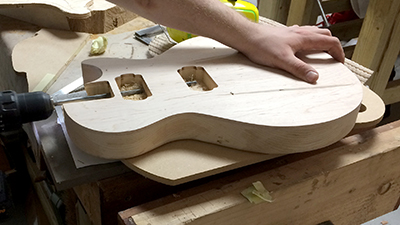
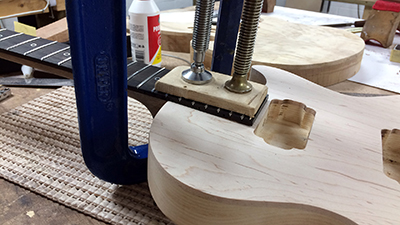
| The last job of the day was to plane the bottom of the neck heel so it would sit in the pocket at the correct angle then glue and clamp the neck to the body, leaving them to set overnight (Fig 58). |
Fig 58 |
Comments (0)