Shopping Cart
There are no more items in your cart
- News
- 0 likes
- 1179 views
- 0 comments

|
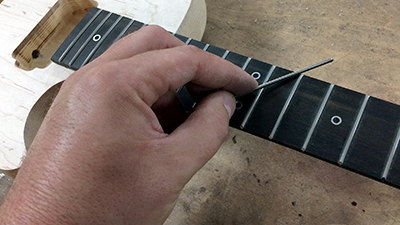
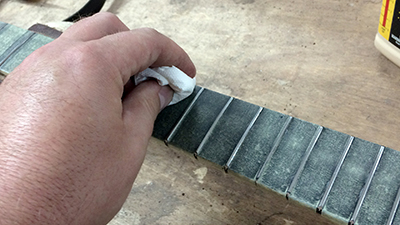
With the neck and body now glued and set, we needed to do some final work on the frets. We took a small file and worked the corner faces of the frets (Fig 59) to make sure there were no sharp edges that could catch the hands and also ensure a nice smooth feel when playing. After this the frets were carefully sanded with fine grade sandpaper to remove any file marks. |
Fig 59 |
|
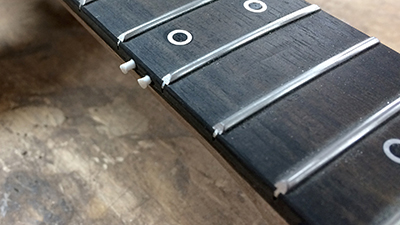
The next step was to install the fret markers to the side of the fretboard. After marking their positions in line with the fret markers on the front face of the fretboard, we drilled 2 mm holes then glued in plastic dowelling, cutting each piece with a slight overhang (Fig 60) then sanding flush with fine grade sandpaper (Fig 61). Although the neck now looked finished to a high standard, there was still more work needed to bring it up to the required quality. We took a cabinet scraper and carefully and gently scraped the fretboard to the sides of the frets with the aim of removing any small traces of glue that may be present. Once we were confident that nothing remained, restorative oil was applied to the fretboard, rubbing it in with ultra-fine grade wire wool. This brought the lustre and depth back to the ebony, making it look its best. |
Fig 60
Fig 61 |
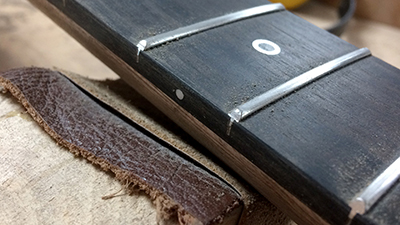
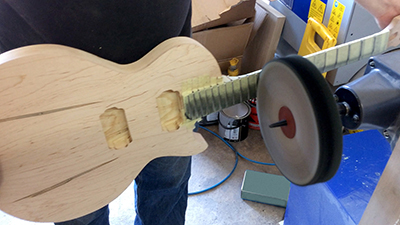
| The final job on the neck was to buff the frets. The fretboard was covered with masking tape for protection, leaving only the frets uncovered which were then polished on a buffing wheel with a fine abrasive wax (Fig 62). This gave great finish but there was one final process to complete - we applied an ultra-fine polish to each fret by hand to give them a mirror-finish (Fig 63). Finally the neck was complete! |
Fig 62
Fig 63 |
|
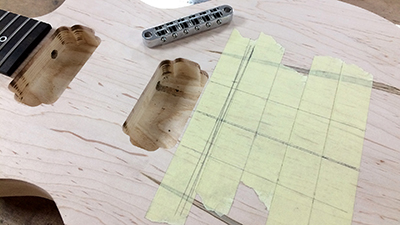
It was now time to install the hardware to the guitar. This was a very nerve-wracking job as all measurements had to be 100% accurate as the positions of the hardware were critical, particularly in the case of the bridge and tailpiece. The reason for this is that the scale length has to be exactly right. The scale length is the distance between the nut of the guitar (the small slotted piece at the furthest end of the fretboard) and the bridge. If the scale length is incorrect, the guitar will be unplayable because the tonal relationship between each fret position will be incorrect, meaning the wrong notes are produced when playing, effectively making the guitar permanently out of tune. To determine the positions of the bridge and tailpiece, a line must be drawn along the guitar body in line with the centre of the neck (Fig 64). This is achieved by extending the lines of the outside edges of the neck along the body and drawing a line at dead-centre between them. The scale length must then be marked, in this case 23 1/4”, and the bridge positioned to ensure that the strings pass over the saddles (the points on the bridge where the strings are at their highest) at this exact point. After drilling and installing the bridge the tailpiece was then positioned and installed at the correct distance back from the bridge. The purpose of the tailpiece is to hold the ends of the strings to the guitar once they have passed over the saddle. |
Fig 64 |
|
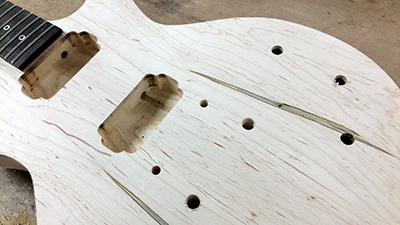
Once we’d established the positions of the bridge and tailpiece, we removed them and drilled the holes for the volume and tone controls as well as the pickup selector and output jack socket (Fig 65). The final operation in preparing the guitar for hardware was to drill the holes to screw on the tuning pegs using a 2 mm drill bit. We carefully aligned the tuning pegs by eye to get the most pleasing angles before drilling. Construction of the guitar body and neck was then complete and we could move on to applying and preparing for a finish. we sanded the whole body and neck with fine-grade sandpaper, paying particular attention to the body which at this stage had received less sanding the the neck. We lightly sprayed the body with water after sanding, to bring the grain up, before sanding back again, repeating this process to achieve a really smooth finish and making sure that there was no grain laying flat which would raise gradually over time to roughen the finish. After a thorough wipe down with white spirit we applied a deep red stain to the top of the guitar then gave it two coats of wax, wiping off any excess between coats. |
Fig 65 |
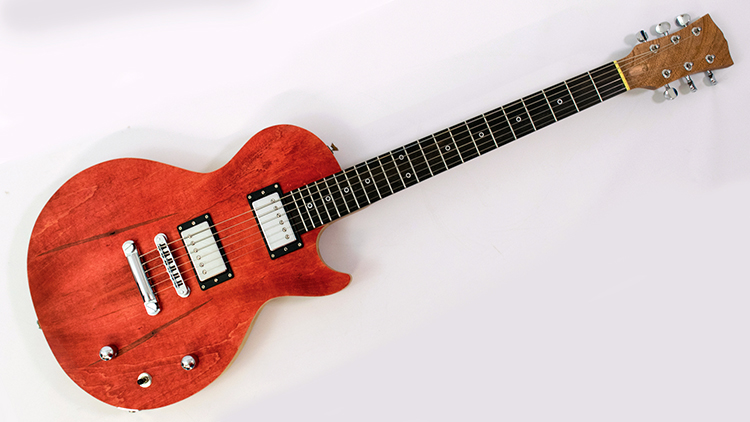
| With the guitar body and neck now complete, we fitted all the hardware and strung the guitar (Fig 66). After a thorough setup including checking the straightness of the neck and intonation, the guitar was finished and ready to play!
|
|
|
Fig 66 |
|
Comments (0)